There’s no better way to celebrate your Sweet 16 than with some fabulous nail art! Of course you’re going all out with your special Sweet 16 outfit and sweet 16 hairstyle and make-up, but you can’t forget your nails.
Time to make sure you’ll remember this amazing once-in-a-lifetime (duh) birthday with some super cute or badass sweet 16 nail art!


Table of Contents
What’s a sweet 16 celebration?
A Sweet 16 is a coming of age party to celebrate a girl’s 16th birthday. It is often considered one of the most important birthdays in a young woman’s life.
Why not commemorate this milestone birthday with some super cute nail art? It’s the perfect way to show off your personality and style. Plus, it’ll be sure to impress all your friends! Make sure to take some pictures of your nails, it will be a fun reminder of your 16th birthday.
Here are some ideas to get you started:


Sweet 16 nail art
1. Glitter ombré:
This look is glamorous and chic. Paint your nails with a base coat of white or light pink. Then, use a Sponge applicator dipped in glitter to create an ombré effect on each nail. Finish with a top coat of clear polish.
2. Sweet 16 birthday cake: This adorable design is perfect for your big day! Paint your nails with a light pink or white base coat. Then use a toothpick or dotting tool to create small dots of frosting on each nail. Finish by adding candles made out of yellow dots.
3. Hearts and flowers: This pretty design is perfect for springtime birthdays. Paint your nails with a pastel colored polish. Then use a heart-shaped stamp or stencil to create hearts on each nail. Finally, add some small flowers using a dotting tool or toothpick.
4. Unicorn nails: These fun and funky nails are sure to stand out! Paint your nails with a light blue or purple base coat. Then use a dotting tool or toothpick to create small dots of different colors all over your nails. Finish by adding a unicorn horn made out of a white dot in the center of each nail.
5. Cheetah print: This fierce and fun design is perfect for animal lovers. Paint your nails with a base coat of yellow, orange, or brown. Then use a cheetah print stamp or stencil to create the spots on each nail. Finish with a top coat of clear polish.
6. Galaxy nails: These out-of-this-world nails are sure to turn heads! Paint your nails with a black base coat. Then use a sponge applicator dipped in glitter to create stars on each nail. Finish by adding a few drops of nail polish to create a galaxy effect.
7. Rainbow nails: These colorful nails are perfect for any occasion! Paint your nails with a white or light colored base coat. Then use a dotting tool or toothpick to create small dots of different colors all over your nails. Finish by adding a top coat of clear polish.
8. Crowns: This regal design is perfect for a princess-themed party or a Sweet 16 birthday. Paint your nails with a gold or silver base coat. Then use a small paintbrush or dotting tool to add crowns on each nail. Finish by adding some small jewels or rhinestones.
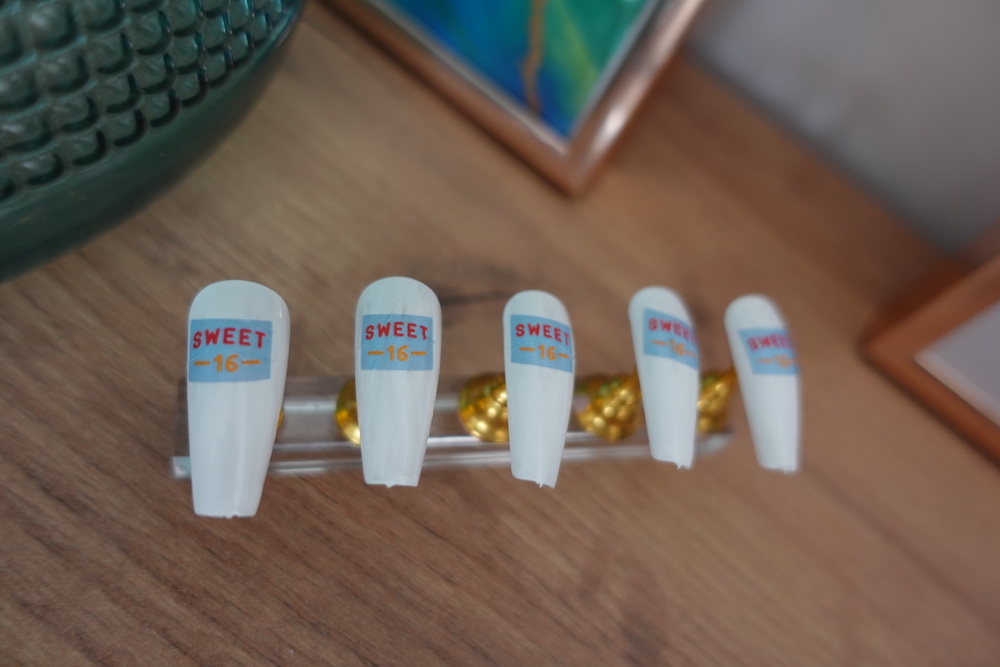
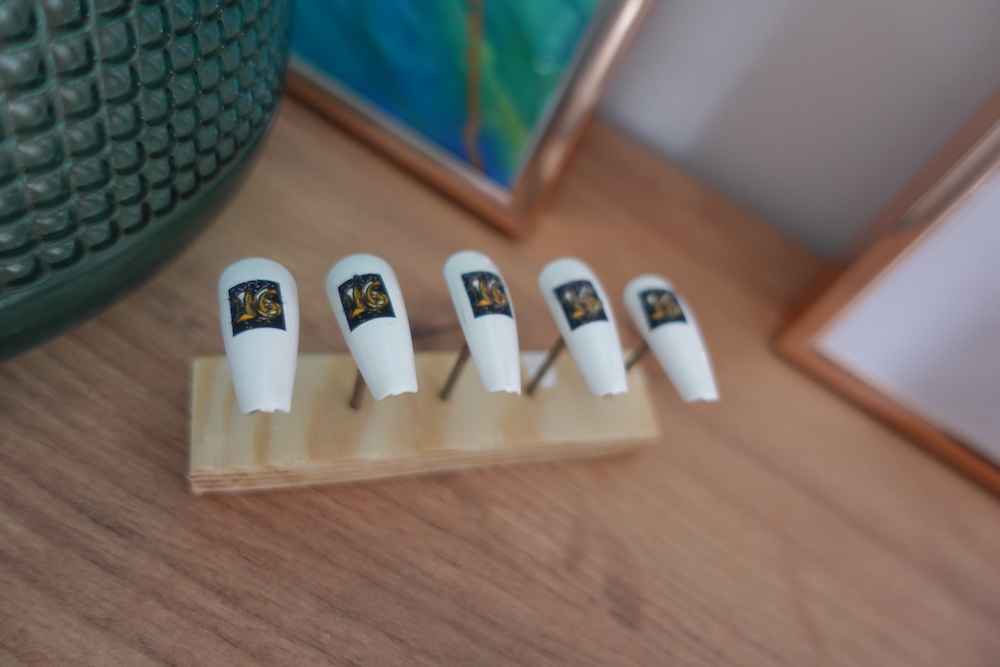
9. “16” nails: This simple but stylish design is perfect for any Sweet 16 celebration. Paint your nails with a light pink or white base coat. Then use a black paintbrush or dotting tool to create the number “16” on each nail. Finish with a top coat of clear polish.
Or, you can make your own nail decals and print those. Apply them onto your nails for a super special look no-one will wear except you!
10.Confetti nails: These festive nails are perfect for any party! Paint your nails with a light pink or white nail polish. Let it dry completely and use a dotting tool with a couple of your fav bright nail polish colors. Finish the look with a coat of Sèche Vite.
11. Go for a classic French manicure with a twist by adding a glittery top coat or some rhinestones. I love finishing my nail art with a coat of holographic topcoat. It just makes it shimmer so much more.
12. Paint each nail a different color – the brighter, the better! This nail art is also called Skittle Nails.
13. Get creative with patterns and designs – think stripes, polka dots, or even hearts. If you’re bad at drawing nail art yourself (like me), you can use nail decals, nail stamping or nail stickers!
14. If you’re feeling really adventurous, try out some 3D nail art using embellishments like beads or sequins. Just make sure to add extra topcoat and to apply the nail art on a strong and good base… otherwise it might fall off kinda fast. And, of course, we don’t want that.
15. Babyboom nails: this design is very trendy these last years, so why not make it yourself? It’ s basically an ombre nail art with a pink and white color, really not that hard to DIY.
16. Flags: what about some festive flags on your nails? You can try this look out for your Birthday nails, but also for your Newyear’s nail art! I have printed out some cute flags on (found them on Canva) nail decal paper and made this nail art with it. Have I told you I have been obsessed lately with making my own nail decals, LOL!
Do you want to know how I made this nail art? It’s really not that hard, actually. First of all, I have painted my nails white (just use your favorite white nail polish) until my nails were fully opaque. Next, you let your nail decals soak in some water until you can slide the decal right off. Place it onto your nails (I use a tweezer) and dip with a dry sponge onto your nail to remove excess water. Let dry and apply a good topcoat. That’s it!
Last but not least, don’t forget to have some fun with your nails! After all, it is your Sweet 16. 🙂
No matter what design you choose, make sure it reflects your personality and style! Which design is your favorite? Let us know in the comments below!


